언리얼 카메라 시점 변경 c++
- 프로그래밍/언리얼
- 2024. 8. 31.
언리얼 카메라 시점 변경 c++
언리얼에서 c++을 이용해 카메라 시점을 변경 하는 방법에 대해 보여주는 글입니다.
이 글에서는 'SetViewTargetWithBlend'함수를 활용해 카메라 전환 시 부드러운 화면 전환을 구현하는 방법을 사용합니다.

Pawn 구성.
먼저 'Character' 클래스에 'CameraComponent'를 하나 추가합니다.
그리고 플레이어가 지정한 키를 누를 때, 레벨에 배치된 'CameraActor'를 찾아 해당 'CameraActor'로 시점을 변경하도록 구현했습니다.
헤더파일(.h)
// Fill out your copyright notice in the Description page of Project Settings.

#pragma once

#include "CoreMinimal.h"
#include "GameFramework/Character.h"
#include "GameTestCharacter.generated.h"

class UInputAction;
class UInputMappingContext;
class UCameraComponent;
UCLASS()
class MINIGAME_API AGameTestCharacter : public ACharacter
{
	GENERATED_BODY()

protected:
	AGameTestCharacter();
	virtual void BeginPlay() override;
	virtual void Tick(float DeltaTime) override;

	UPROPERTY(EditDefaultsOnly)
	TObjectPtr<UStaticMeshComponent> BodyMesh;
	UPROPERTY(EditDefaultsOnly)
	TObjectPtr<UCameraComponent> MainCamera;

private:
	//카메라 변경을 위한 bool변수.
	bool bToggleCam;
#pragma region TestPlayerInputSettings
	UPROPERTY()
	TObjectPtr<UInputMappingContext> TestContext;
	UPROPERTY()
	TObjectPtr<UInputAction> SwitchAction;

	virtual void SetupPlayerInputComponent(class UInputComponent* PlayerInputComponent) override;
	//input이 들어왔을 때 카메라 변경해줄 함수.
	void SwichCamera();
#pragma endregion
};
cpp파일(.cpp)
// Fill out your copyright notice in the Description page of Project Settings.
#include "Character/GameTestCharacter.h"
//input
#include "EnhancedInputComponent.h"
#include "EnhancedInputSubsystems.h"
#include "InputAction.h"
#include "InputMappingContext.h"
//Camera
#include "Camera\CameraComponent.h"
#include "Camera\CameraActor.h"
#include "Kismet\GameplayStatics.h"
// Sets default values
AGameTestCharacter::AGameTestCharacter():bToggleCam(1)
{
// Set this character to call Tick() every frame. You can turn this off to improve performance if you don't need it.
PrimaryActorTick.bCanEverTick = true;
BodyMesh = CreateDefaultSubobject<UStaticMeshComponent>(TEXT("BodyMesh"));
BodyMesh->SetupAttachment(GetRootComponent());
SetRootComponent(BodyMesh);
//메인 카메라.
MainCamera = CreateDefaultSubobject<UCameraComponent>(TEXT("MainCam"));
MainCamera->SetupAttachment(GetRootComponent());
//InputSettings
static ConstructorHelpers::FObjectFinder<UInputMappingContext> FIndTestMappingContext(TEXT("InputMappingContext'/Game/Blueprints/Input/IMC_Test.IMC_Test'"));
if (FIndTestMappingContext.Succeeded()) {
TestContext = FIndTestMappingContext.Object;
}
static ConstructorHelpers::FObjectFinder<UInputAction> FindTestAction(TEXT("InputAction'/Game/Blueprints/Input/InputAction/Test/IA_TestSpace.IA_TestSpace'"));
if (FindTestAction.Succeeded()) {
SwitchAction = FindTestAction.Object;
}
}
// Called when the game starts or when spawned
void AGameTestCharacter::BeginPlay()
{
Super::BeginPlay();
UEnhancedInputLocalPlayerSubsystem* SubSystem = ULocalPlayer::GetSubsystem<UEnhancedInputLocalPlayerSubsystem>(GetWorld()->GetFirstPlayerController()->GetLocalPlayer());
if (IsValid(SubSystem)) {
SubSystem->AddMappingContext(TestContext, 0);
}
//시작하고 화면을 클릭하지 않아도 키보드 동작이 가능하도록.
FInputModeGameOnly InputMode;
GetWorld()->GetFirstPlayerController()->SetInputMode(InputMode);
}
// Called every frame
void AGameTestCharacter::Tick(float DeltaTime)
{
Super::Tick(DeltaTime);
}
void AGameTestCharacter::SwichCamera()
{//카메라 변경 토글 함수.
float BlendTime = 1.f;
if (bToggleCam) {//bToggleCam이 1인경우 SubCam으로 변경
//CameraActor를 Level에 하나만 추가해놓은 상태라 GetActorOfClass함수를 사용하면 원하는 카메라가 선택됨.
AActor* SubCameraActor = UGameplayStatics::GetActorOfClass(GetWorld(), ACameraActor::StaticClass());
GetWorld()->GetFirstPlayerController()->SetViewTargetWithBlend(SubCameraActor, BlendTime);
}
else {
GetWorld()->GetFirstPlayerController()->SetViewTargetWithBlend(this, BlendTime);
}
bToggleCam = !bToggleCam;
}
// Called to bind functionality to input
void AGameTestCharacter::SetupPlayerInputComponent(UInputComponent* PlayerInputComponent)
{
Super::SetupPlayerInputComponent(PlayerInputComponent);
UEnhancedInputComponent* EnhancedInputComponent = Cast<UEnhancedInputComponent>(PlayerInputComponent);
if (IsValid( EnhancedInputComponent)) {
EnhancedInputComponent->BindAction(SwitchAction, ETriggerEvent::Started, this, &AGameTestCharacter::SwichCamera);
}
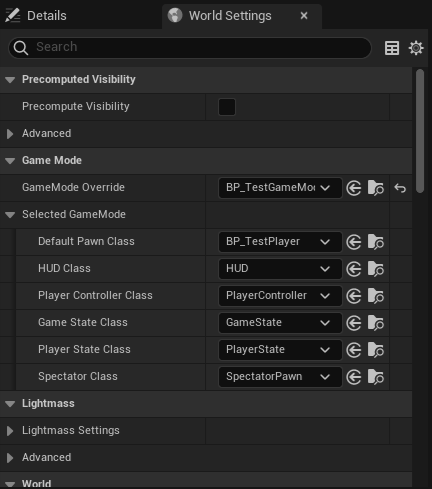
}테스트 환경 구성.
GameMode
'GameMode'는 'Default Pawn Class'만 변경했습니다.
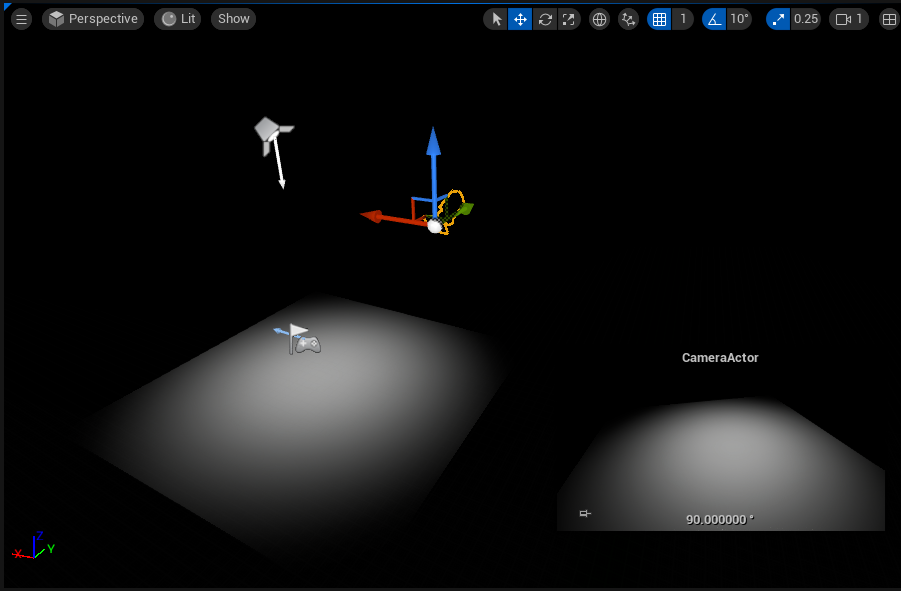
Level
카메라 시점 변경만 테스트할 예정이기때문에 Level은 간단하게 구성했습니다.
바닥, Camera Actor ,PlayerStart, SpotLight.만 배치했습니다.
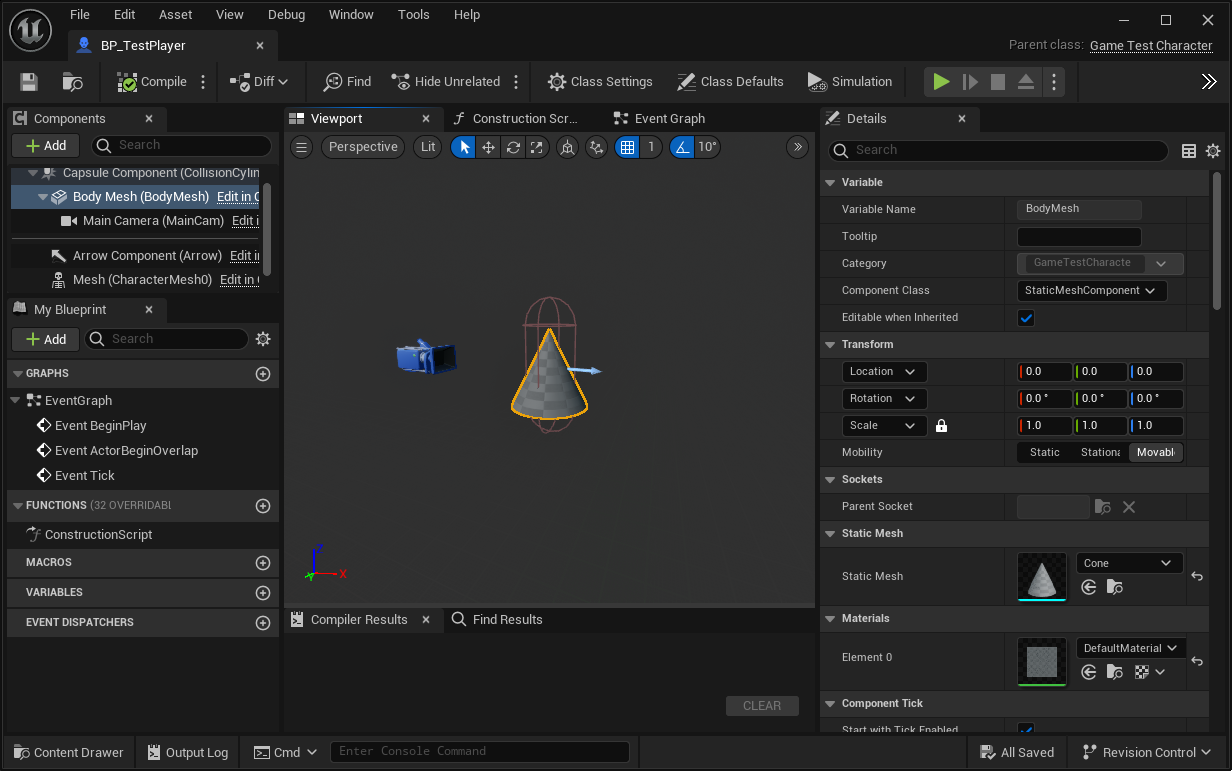
Pawn
위에서 설명한 AGameTestCharacter를 BP로 만들어서 사용합니다.
원뿔 Mesh를 추가하고 카메라 위치만 조절했습니다.
다 만들고 보니까 왜 Character로 만들었는지 모르겠네요.ㅋㅋㅋㅋ
테스트하는 데는 상관없으니까... 넘어가죠?
실행결과.
Space를 누르면 Level에 존재하는 CameraActor를 찾아서 시점이 변경됩니다.
다시 한번 space를 누르면 원래 카메라로 시점이 변경됩니다.
시점변경을 사용한 예시.
아래 동영상은 제가 만들던 공포게임에서 SetViewTargetWithBlend를 사용하여 시점을 변경한 부분입니다.
상자의 자물쇠를 누르면 플레이의 카메라에서 자물쇠의 카메라로 부드럽게 보간하 시점이 변경됩니다.
특정키를 누르면 자물쇠의 카메라에서 다시 플레이어의 카메라로 부드럽게 보간하며 시점이 변경됩니다.
위에서 작성한 코드와 동일한 방식입니다.